Ahh, one more note. You will notice that I am using both metrics and standard in the picture. You must use one or the other. The measurements are proportional and will be accurate in either measurement. Thank you.
Sirius8ly
 I conected the coil to my AC power supply (a battery charger) and held two neodym magnets in my hand six inches above this new coil. I could feel a strong vibration coming from my hand as a result of the eminating magnetic field. On monday, I put aligator clips on another power supply that I have that puts out 5.1 volts 2 amps DC. I tested this coil in the same manner today using this DC power supply. I held the magnets in my hand about 6 inches above the coil and felt nothing. I tested the power supply on my smaller Rodin coil and it functioned fine. I placed the neodym magnets in the center of the coil on my "workbench" and connected the negative wire to the negative connection and touched the positive conection with the power supply wires to the positive terminal of the coil. I saw the magnets move slightly only to stop immediately. I thought it might be a short but was not sure. I decided to try the in hand experiment again but this time, I manually pulsed the DC current by hand while holding the other hand six inches above the coil with the neodyms. As I tapped the positive connection, I felt the same motion in my hand with the magnets. It wasn't just that I could feel the pulsing of the magnets but rather it felt like waves pulsing cresting, peaking, and then resting to neutral with each pulse. I am begining to understand that DC by itself is useless but when you add the pulsing action, the strength of the electromagnetic field appears much stronger for the moments that the pulse peaks. I hope this information helps anyone else performing the same types of experiments.
 I started the next phase of this particular design and I wanted to share the progress as I construct and add more and more elements. I have included the photos at the end. There is not much difference in the coil that I am building except that the copper windings are going to be made from copper sheets instead of wires, and the dimensions are a bit more precise. I am using pressed paper that is somewhat firm. I cut two circles 5.5 inches in diameter with a 3/4 inch thickness and 3/4 inches in hight. I am using the same material to provide support to give the coil its hight. This will become more clear as you view the photos. With the high frequency division between the alternating coil wires, I am hoping to obtain at least a small weight loss or levitation (anti-gravity) by the end of one and a half months.Using these demensions, you can scale it up to what ever size you wish. I took these measurments from a design by Stan Deyo's 30 foot anti-gravity lift coil. I calculated that it was 30 foot in diameter, 3foot 6 inches in height and thickness and uses 6 inch width by 1/2 inch flat copper wire. There is some confusion as to use or not to use an iron core or leave it as an air coil. I will experiment with both. I would like to request that if anyone tries to build this and uses an iron core and has success or not, please let me know. With that I will keep you posted. Thank you.


 fig.1
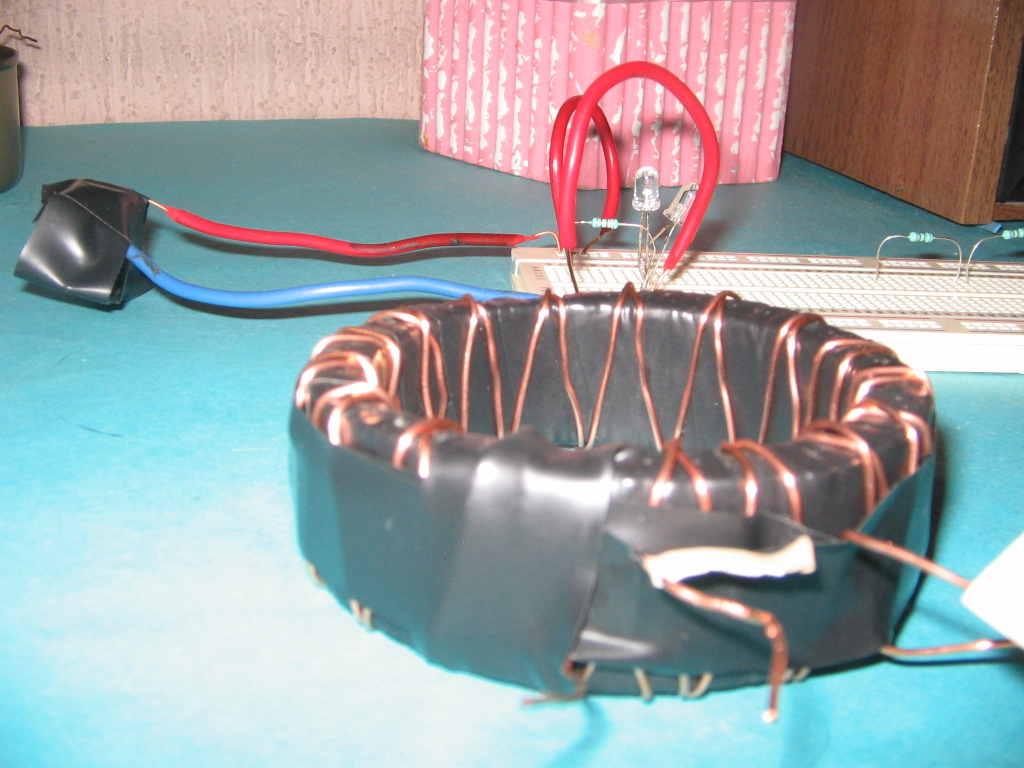
fig.1 fig.2
fig.2 I started my day excited to finally go to the town center and buy my 30 meters of magnetic wire for my new Rodin coil. I made the trip into down town Mexico City only to discover that most of the shops were closed due to the fact it is Semana Santa (holy week, easter). Disapointed, I began my trip back home in the early afternoon and while I was in the subway, I made a decision to pull the wire off my Rodin coil and create a new coil until I could obtain the new wire for a new and improved Rodin coil. I wanted to create a coil based on the works of Stan Deyo (who I mentioned in some of my earlier blogs). The idea is a coil that has the windings counter to each other, pulsed DC current set to seperated phase trains. This is supposed to create two opposing electromagnetic fields. When two opposing magnetic fields come into close proximity to each other, one or both fields try to correct themselves. This releases energy called a torsion field and is supposed to be observed as an anti-gravity effect. I put the coil together and ran some preliminary tests using a couple of permanent magnets and the effect of one of the coils gave me satisfactory results. I tested the other portion of the coil and recieved the same results. Bare in mind that I have not scraped enough money to buy any volt meters or DC power supplies and am going strictly on feel up to this point. I wanted to know if I connected both positives together and both negatives together would give me double the magnetic field strength. I hooked them together and connected the device to the old 1970's battery charger that I had been using as a power supply and... Spark!!!
 I have put together a 3d rendering of a possible levitation device that I would like to put together based upon the information I have managed to gather up to this point. This is just an idea that I am playing with and if new information comes out that makes me re-think this prototype, I will make modifications as I see fit. As you can see in the photo, I have marked the various components with letters. A is an aluminum dome supported by 4 hollow wooden pillars represented by letter B. They are hollow as they house the wires coming from the capacitors represented by E. G houses the electronic circuits and F is nothing more than a base. D is a sonic transducer and C is the Stan Deyo device that I mentioned in my earlier blog. The reason behind my design is that I wanted to design a system that used a variety of systems to produce possible anti-gravity levitation. I will explain step by step all that I hope to accomplish and my theories behind each.